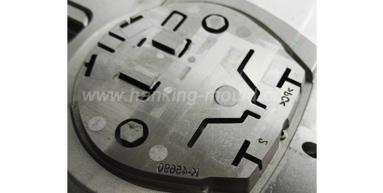

1. Tooth profile processing: the straight teeth are precision processed by slow-moving wire, and at least 1 trimming and 3 cutting tools are selected to achieve a smoother surface; the helical gear ring is processed by the gear electrode spiral, and the precision of the helical tooth electrode is very high.
2. The processing of the circular tube position block on the parting surface requires the simultaneous slow wire processing of the A and B plates to ensure accurate coaxial positioning.
3. Cylindrical molds and inserts need to be processed by internal and external cylindrical grinders, and the mold cavities of plates A and B must be processed by coordinate grinders. Otherwise, the cylindricity, straightness, verticality and roughness cannot meet the requirements and products cannot be"precise".
4. For general gear ring inserts, after the tooth profile is processed, the thickness of the workpiece is not allowed to be processed by a grinder, otherwise it will cause transverse burrs on the tooth surface, and the workpiece will be scrapped. In the case of real need, only EDM processing is used to reduce the surface.
5. Die polishing: die polishing and burring are absolutely not allowed on the tooth surface and edges, and the relevant roughness can only be achieved by one-time electric machining. At the same time, the longer the processing time of the gear mold, the smoother the steel tooth surface will be.
1. During T1, the water line must be connected. The gear mold is different from the casing mold. The design structure has determined that the water line can be connected before T1. If the water line is not connected, the sample will vary greatly in size and local thermal balance, which directly affects the crystallinity and shrinkage of the plastic material, and affects the accuracy and dimensional stability of the product.
2. During T1, first ensure the outer diameter and thickness of the gear, because these two dimensions are generally ignored or hard to change during the repair of the gear mold. Then check other dimensions. As long as the first two are guaranteed, and with the stable molding conditions, other dimensions can be temporarily accepted, and then the mold is repaired and completed for the second time. Generally speaking, when the outer diameter of the tooth is guaranteed, the outline of a single tooth profile will not be much different from the theoretical one.
3. Once the end of the product has shrunk at both ends or in the middle, even if the adjustment cannot solve problem, please note that this does not necessarily mean that the sample is NG. In most cases, as long as the meshing situation is acceptable, the customer will generally accept it.
To measure the outer diameter of the tooth, a digital caliper can generally be used, but for gears with multiples of 3 and 5 teeth, a 3-hook micrometer and a 5-hook micrometer are used. Film projected outline can be on tooth profile.
However, for precision testing, professional gear electronic testing equipment is required. The sample gears are fitted with standard teeth to mesh with each other, and then the relevant parameters of the required gears are input. The computer automatically displays the testing data, including the radial runout of the gears and other parameters.


 Call us on:
  Email Us:
  No.23, XingYi Road, Wusha Community, Chang'an Town, Dongguan City, Guangdong Province, China.